

Printing Postcards with Lightroom
Getting more life from your favourite photos
Getting more life from your favourite photos
Your holiday is over. Your photos have all been posted to Instagram and Facebook. Your friends were suitably impressed. And now… what? Those photos have been superseded by other stuff in your feed, or more importantly, your friends’ feed, never to be seen again.
Depressing.
Let’s fix that. Let’s create some postcards. Old fashioned I know.
The thing is a postcard gets attached to the fridge with a magnet or a bulletin board with a tack. If you are honoured with a place on the fridge, then you and your work will be in the face of anyone going to get the milk. Who knows that face may be impressed and take note. At the very least, your work is on display.
Printing the Front Side
Paper
The first thing you need is a paper — four by six paper. This is the correct size for US Postal Service Post Cards. Preferably, you will want paper that you can print on both sides. Currently, I am in love with Hahnemuhle FineArt InkJet Photo Cards. You can use other papers but you will want to check that it isn’t branded on the back like some of Canon’s four-by-six papers. The branding will mess with the address and note area.
Hahnemuhle FineArt InkJet Photo Cards come in a number of paper types. Usually, you will purchase thirty cards packaged in a very nice presentation tin. I prefer the FineArt Baryta Satin.
One quirk with their Photo Cards line is that they have rounded corners so printing full bleed (edge to edge) can be a challenge. Hahnemuhle has a technique, but I really don’t want to fuss with it. My solution is to create a mask and overlay that when printing.
Masking the Front for Round Corners
I have created a PNG file that I use as a frame to mask the front of the photo I want to display on my postcard.
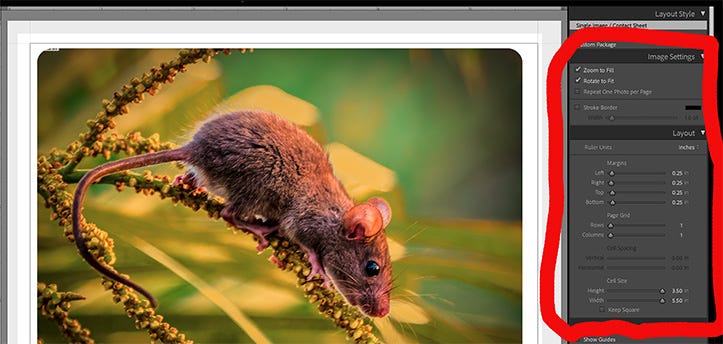
For the mask to work, the image needs to be placed correctly. Above you can see my image settings and layout panes.
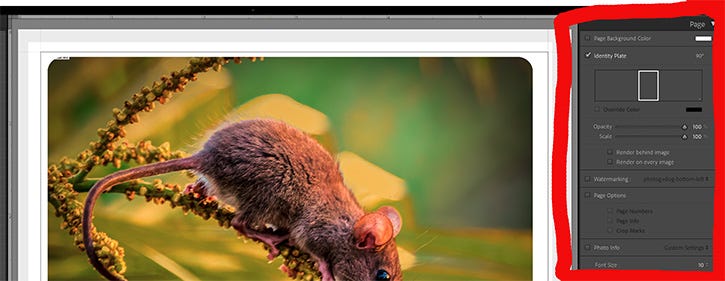
And here are the Page Panes settings. Note the use of an Identity Plate. This is the frame that gives the image a round corner similar to the rounded corners of the card.
Printing the Backside
Things to watch out for
The backside of the postcard is a bit more complicated. First, the Post Office is really picky about how the backside is laid out. Seems they don’t want decorations from interfering with the address space. Pay attention to this!
Another thing about the backside is that you are printing on a surface that was not optimized for print. While Hahnemuhle has created the cards so that the back will absorb ink, the detail is not good. I print only in Black and White here. I have tried some other papers, but the ink doesn’t absorb at all leaving a mess.
First Option
If you are not adventurous, then just use a simple image like these printed on the back of the card.


On the left, is the image I was given by the Hahnemuhle representative at a trade show. On the right, after making it my own.
If this is good enough, then you are done. Simply print to the back of your cards.
More Complicated Option
I had the brain wave that I should show the title of my photo and where in the world it was taken. To do this, I had to set up a new print template.
To get the print as a thumbnail, I set the layout so that my photo is in the top left corner of the card. There was some fussing and mussing to position it nicely in both vertical and horizontal modes.

I converted my image of the postcard back to a PNG so that all of the white areas will be transparent. This PNG file becomes the Identity Plate.
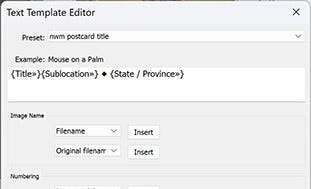
The photo title and state come from the metadata using a custom text template.

Notice the Print Info option at the bottom of the Page Pane. Click on it and the Text Template Editor comes up. Select your fields and you are done.
Well almost — Adobe doesn’t do well here. I found that doing a final edit on the Print Template required setting the font smaller and a New Line character where I wanted it. Explaining these details is a bit beyond where I want to go with this article.
About Rover Dave
Dave Scott is a travel and nature photographer who loves to explore. Or is that an explorer who loves to travel and shoot nature photography?
Having squandered his youth providing for his family. He now seeks out places that inspire. The Pacific Northwest provides many opportunities close to home; sometimes he and Liddy venture farther.
The world is a beautiful place. Share the beauty. Leave only footsteps.