

A walk in the woods
I am always on the lookout for a new learning opportunity.
I am always on the lookout for a new learning opportunity.
A couple of days have passed since arriving in Waldmohr, Germany. Jet lag seems to be behind us. I was up and out with Liddy as the sun was rising — well maybe a bit later. We are forty-nine and one-half degrees north of the equator, and it is the middle of December. The sun is up later, and it stays lower on the horizon.
This was my first opportunity to walk in a European let alone German woodlot. The trees are mostly hardwoods — deciduous — so they shed their leaves. They are spaced out quite a bit making the woodlot feel park like. There were a number of spots where sunlight was penetrating through the non-existent canopy creating some interesting effects if not a useful composition.
A lone tree alongside the path caught my attention. Dried-up leaves still hanging on its branches were side lit by that low sun. They seemed to be glowing. There is this branch hanging in from the right side of the frame that detracts if not distracts.
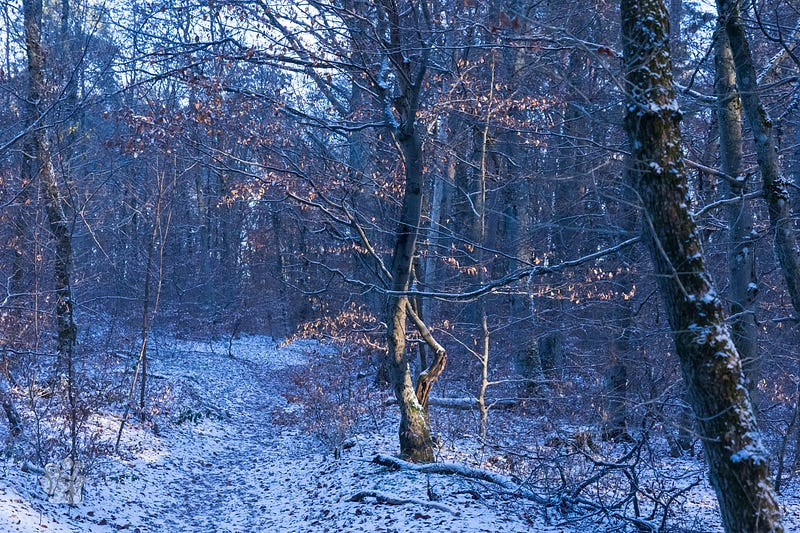
Short of a pruning saw, I moved to minimize the branch in the frame by aligning it with one in the midground, my subject tree. Not perfect, but it isn’t hanging out there quite like a scarecrow’s arm at Halloween. I could have reframed so that the branch would have been easier to prune in photoshop, but I really wasn’t looking for that kind of opportunity.
Post Processing in Lightroom
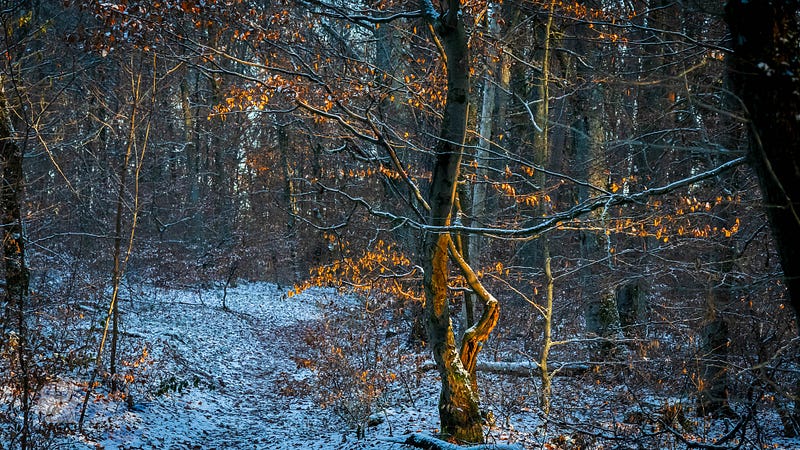
In Lightroom, I cropped to a 16:9 ratio — same as most monitor screens today. During the crop I pulled way in on the right using that big tree as the beginning of a vignette. I also cropped up to the base of my subject tree which eliminated the hotspot in the bottom left corner and the noisy garbage bottom right. The crop removed the top of my tree and the bright spots in the sky.
Setting the white balance and pressing Auto in the basic settings gets me to a starting point. If I don’t like the results of this first step, I can undo, or just tweak those sliders I’m not happy with.
Now I move on to Lightroom’s new masking tools — awesome masking tools.
The first step is to brush that trunk that is now against the right margin and darken it way down.
Next, the hot spot amongst the trees by the path, bottom left. This type of adjustment has always been a challenge to me. Usually I will tweak the shadows, highlights, exposure and get a muddy mess. Exactly what I did this time.
Removed that mask and started over. This time I restrained myself, only pulled those usual sliders to the left a bit. My brain wave this time was to adjust the color temperature, moving the slider well into the blue. This achieved my desired effect of toning down the snow. Now it wasn’t pulling my eye straight there, away from my main subject.
On to the main event. I started by picking a color mask selecting the glowing leaves. As expected, it selected too much. I added more subtraction masks, to remove the branches and stems I didn’t want.
Changing the temperature slider and tint to bring up the glow, open the shadows, drop the highlights, tweak whites, blacks, and a bit of positive dehaze.
Done
So, this photo is not ever going to win a prize at the fair, or compete with the work of Simon Baxter, but I didn’t capture the composition with that in mind. When I took the shot, I saw a learning opportunity. I knew it was going to push my skills in Lightroom, and it did. So, mission accomplished.
I like the painterly effect achieved, and the general peacefulness of the scene. I’ll put it into my wallpaper folder to enjoy.